We’re officially at the 2 week mark: meaning exactly 2 weeks
from today is Thanksgiving, already (can you believe it?). If you’re doing the
cooking this year that means you’re already getting revving up; stocking up
supplies, taking final head counts, and looking for any last minute add-ons. I’m
going to add a new recipe idea here and there to see if we can’t help inspire
and entice you to steal the show with a new flavor or two. Today I found a
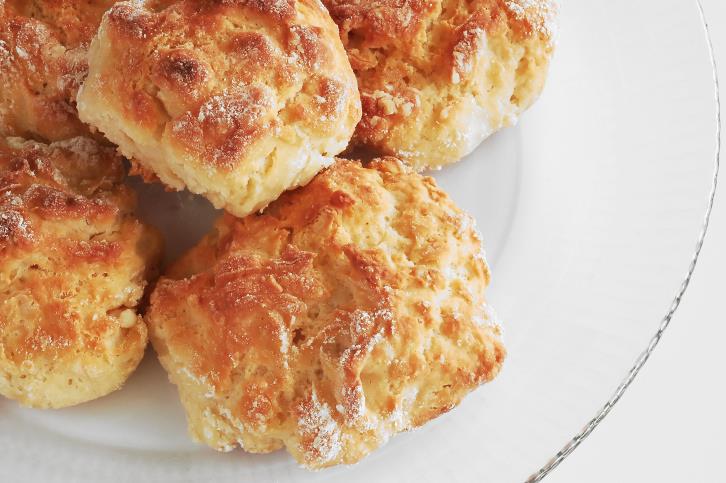
fabulous new take on traditional dinner rolls: Brie and Chive biscuits.
You’ll need:
- 2 cups of all-purpose flour, plus more for
surface work
- 2 teaspoons of baking powder
- ¼ teaspoon of baking soda
- ¾ teaspoon of kosher salt
- ¾ cup of buttermilk (you can make your own by
combining a cup of whole milk or heavy cream with 1 tablespoon of lemon juice
or vinegar. Stir them together, let sit for 5-10 minutes, and you’re good to
go.)
- 6 ounces of brie, cut up into ½ inch pieces,
including the rind
- 6 teaspoons of cold butter, cut up into small pieces
- 2 tablespoons of fresh, chopped chives
Line a baking sheet with parchment paper and preheat your
oven to 375 degrees. Combine all of your dry ingredients in a bowl and stir
until blended. Add in your butter and using a pastry blender cut until your
mixture gets crumbly. Add in your brie pieces and chives, and then toss to
combine. Add in your buttermilk and stir until absorbed (don’t over mix).
Lightly flour your work surface and transfer your dough
to it. Knead it gently a few times to bring it together. Gently spread out your
dough until it’s about 1 inch thick. Use a floured 2 inch cookie cutter or small glass
to cut out 16 biscuits (reshaping your scrap dough and re-flouring as needed). Place
on your baking sheet and bake until golden brown, about 15 to 18 minutes.
So we’re officially beyond Halloween and on to November. I
get “little kid on Christmas” giddy just thinking about the Thanksgiving and
holiday prep to come! Yes, I know, I’m a holiday addict and I should probably
head to TRA (Turkey Roasters Anonymous) but I haven’t gotten to the “accepting
I have a problem” stage yet! Anyway, like we started, it’s November and holiday
preparations are likely already underway in your home (or at least in your head).
To help you along the way I figured I’ll post up some simple recipes and cheat
sheets to help keep your Thanksgiving Day and beyond as simple and peaceful as
possible! What better what to start out the thanksgiving countdown than with a
Turkey cheat sheet?
How big of a turkey do you need?
It is suggested that you figure 1 ¼ pounds of turkey per
guest. Of course, the majority of your guests aren’t going to eat a full 1 ¼ lbs.
of turkey, but after waste and bones that equals out to more than enough for
your guests and leftovers.
How long will it take your turkey to thaw in the refrigerator?
You’ll want to allow a full 24 hours to thaw per 5 lbs. of turkey.
So if you have a 15-16 lb. turkey, your best bet is to have it in the fridge
defrosting by Sunday night.
What if you want or need to thaw your turkey quicker?
You can use a sink with a stopped, lobster pot, or cooler to
defrost the turkey with cold water. You’ll fill until submerged and then change
the water every 30 minutes. This method is faster, but it’s still time consuming.
It still takes about 6 hours for a 12 pound turkey, so give yourself enough
time.
Are you brining the turkey?
You can brine the turkey as it defrosts in the refrigerator,
½ cup kosher salt to 1 gallon of water. If you’re brining the thawed bird (for
24 hours or less) use 1 cup of salt per 1 gallon of water. The turkey must be
kept below 40 degrees, though! You can also add any other flavorings to taste:
cloves, rosemary, orange slices, bay leaves, garlic, onions, lemons, etc.
Dry curing or
pre-salting?
You can also use a dry curing, or dry rub of sorts, the last
day or two before roasting. Use a ½ cup of kosher salt per pound of turkey, and
any other seasonings that you desire (salt and cracked pepper corns are a
simple and delicious option). Spread over the skin and into all crevices of the
bird. It’ll look like too much salt if you’ve never done it before, but it’s
not. Place the turkey uncovered on a cookie sheet back into the fridge for the
last one to two days. This also helps to dry out the skin so that it’ll crisp
in the oven.
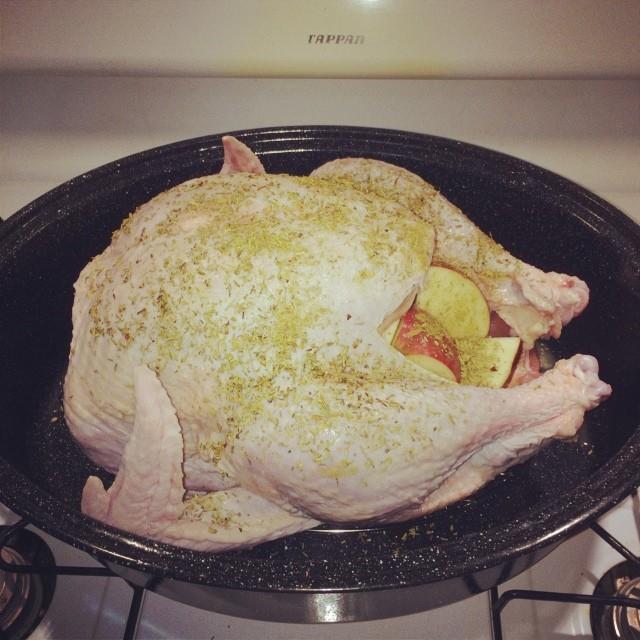
Do you stuff or truss the bird?
If you’re going to the perfect, most moist turkey that
anyone has ever had…then no. With trussing the bird, you keep it together
picture perfect, but it will take longer to cook the legs thoroughly. With
stuffing the bird you really need to make sure to cook it long enough that the
stuffing has reached the safe, 165-170 degrees all the way through. Both may
cause your breast meat to dry out. Your best bet is to let the bird lie without
trussing and stuff it with aromatics (such as lemons, oranges, onions, garlic,
etc.) instead.
Roasting the actual turkey?
My favorite method is low and slow, starting at 450 degrees
for the first 30-45 minutes, and then turning the oven back to 325 for about
12-15 minutes per pound. You can also roast at a high 425 degrees for 1 ½ - 2 ½
hours (depending on the size of the bird). Either way, use a meat thermometer
to check multiple sections of the bird at the end of your time period to see if
it’s really done. You want at least 165 degrees to be safe, I usually aim for
170.
To baste or not to baste?
Nope! All you’re really doing when you baste is letting heat
out and moistening the skin so it stays flabby, rather than crispy. Your
flavoring is in your dry rub, any herb mixture that you chose to run under the
skin before roasting, and your aromatic stuffing.
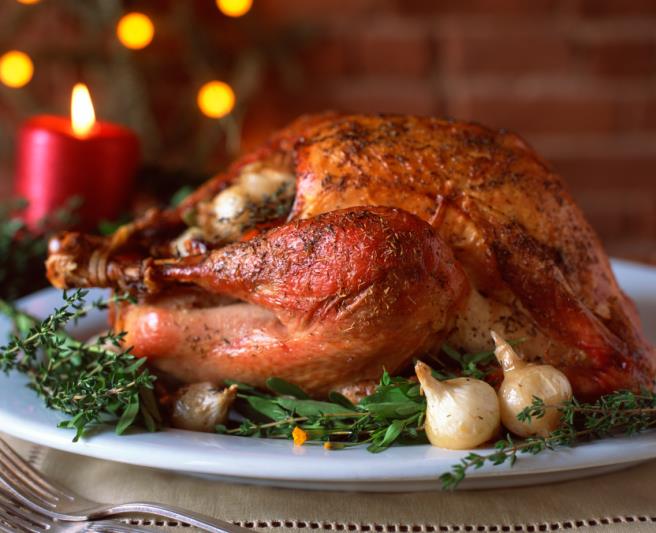
Must it rest?
Absolutely! Once your turkey is up to temperature, remove it
from the oven and allow it to rest, tented with tinfoil, for 20-30 minutes. This
will help it retain its juiciness.